
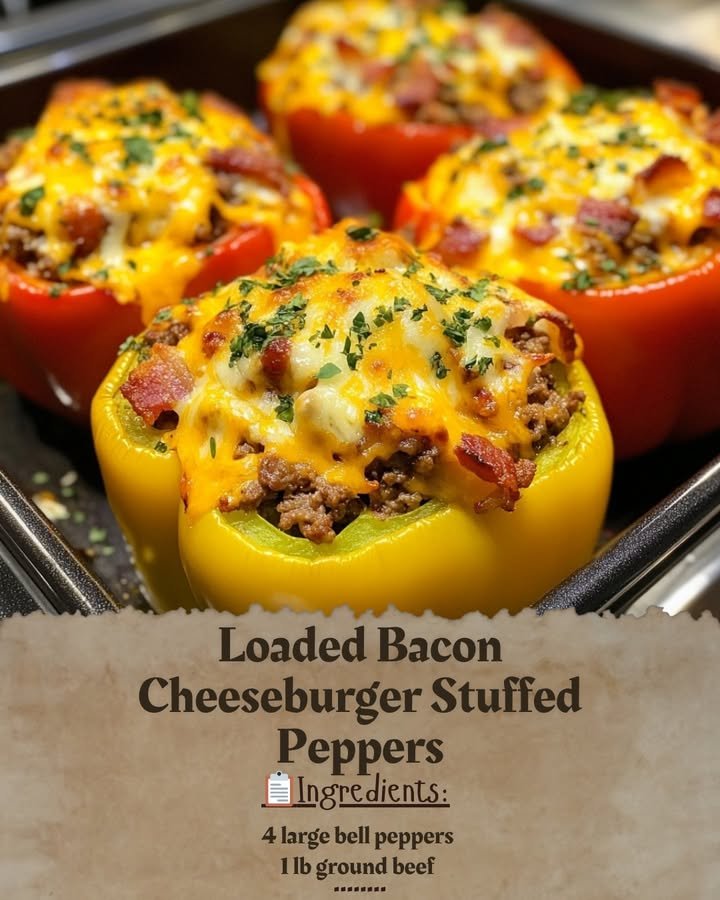
Loaded Bacon Cheeseburger Stuffed Peppers
Step-by-step instructions
Ready to bring this delicious dish to life? Follow these simple steps:
- Preheat your oven to 375°F.
- Cut the tops off the bell peppers and remove the seeds and membranes.
- In a skillet over medium heat, brown the ground beef until fully cooked.
- Add the diced onion and minced garlic, cooking until softened and fragrant.
- Stir in the ketchup, mustard, salt, and pepper to season the mixture.
- Take the skillet off the heat and fold in half of the shredded cheese and half of the crumbled bacon.
- Spoon the beef mixture into each bell pepper, placing them in a baking dish.
- Top each stuffed pepper with the remaining cheese and bacon.
- Cover the dish with foil and bake for 25-30 minutes, until the peppers are tender.
- Remove the foil and bake for an additional 5 minutes, allowing the cheese to melt.
- Serve the Loaded Bacon Cheeseburger Stuffed Peppers hot and enjoy!
How to plate and pair
To elevate your meal experience, serve the stuffed peppers on a colorful plate alongside a simple green salad or some crispy sweet potato fries. A dollop of sour cream or a drizzle of ranch dressing can also add a creamy finish. For drinks, a refreshing iced tea or a classic soda complements the flavors perfectly.
Keeping leftovers fresh
To store any leftovers, allow the stuffed peppers to cool completely. Place them in an airtight container and refrigerate for up to 3-4 days. When you’re ready to enjoy them again, reheat in the oven or microwave until warmed through. You can also freeze the stuffed peppers for up to 3 months—just make sure to wrap them well!
Helpful cooking tips
Here are some extra tips to help you achieve the best results:
- Prep Ahead: You can prepare the beef mixture a day in advance, storing it in the fridge until you’re ready to stuff the peppers.
- Don’t Skip the Foil: Covering the dish with foil while baking ensures that the peppers cook evenly and retain moisture.
- Make It Your Own: Feel free to customize the filling with additional toppings like jalapeños for a kick, or use different types of cheese based on your preference.
Creative twists
For those looking to switch things up, consider these variations:
- Spicy Version: Add diced jalapeños or hot sauce to the beef mixture for a spicy kick.
- Vegetarian Option: Substitute the ground beef for lentils or a mix of sautéed vegetables, and use a plant-based cheese.
- Italian Twist: Replace the mustard and ketchup with marinara sauce and top with mozzarella for an Italian-style stuffed pepper.
Common questions
What’s the prep time for this recipe?
Prep time is about 15 minutes, and total cook time is around 35-40 minutes, making this a quick and easy dish.
Can I prepare these peppers in advance?
Absolutely! You can prepare the stuffed peppers a day ahead and bake them when you’re ready to serve.
How do I know when the peppers are done cooking?
The peppers should be tender but still slightly firm. You’ll see them change color and soften as they bake.
Explore new flavors while enjoying a classic cheeseburger experience with these Loaded Bacon Cheeseburger Stuffed Peppers! They’re perfect for any occasion and sure to impress everyone around the dining table.

Loaded Bacon Cheeseburger Stuffed Peppers
Ingredients
Method
- Preheat your oven to 375°F.
- Cut the tops off the bell peppers and remove the seeds and membranes.
- In a skillet over medium heat, brown the ground beef until fully cooked.
- Add the diced onion and minced garlic, cooking until softened and fragrant.
- Stir in the ketchup, mustard, salt, and pepper to season the mixture.
- Take the skillet off the heat and fold in half of the shredded cheese and half of the crumbled bacon.
- Spoon the beef mixture into each bell pepper, placing them in a baking dish.
- Top each stuffed pepper with the remaining cheese and bacon.
- Cover the dish with foil and bake for 25-30 minutes, until the peppers are tender.
- Remove the foil and bake for an additional 5 minutes, allowing the cheese to melt.
- Serve the Loaded Bacon Cheeseburger Stuffed Peppers hot and enjoy!