Glazed Christmas Cookies
A Delightful Holiday Treat
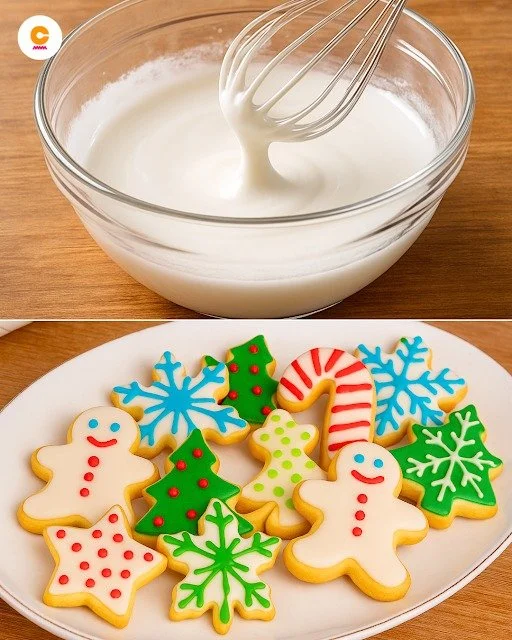
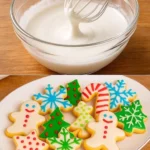
Each holiday season, I find myself searching for the perfect cookie recipe. That’s when I stumbled upon these Glazed Christmas Cookies, an easy yet festive treat that brings everyone together. Soft, buttery, and topped with a glossy glaze, these cookies are ideal for family gatherings and gift-giving alike. The addition of food coloring and sprinkles makes them a creative canvas for decorating, ensuring that every batch is unique and festive. If you’re looking for a delicious way to celebrate the holidays, you’ve just found it!
What Makes This Recipe Special
Why go the extra mile for these cookies? First off, they’re incredibly simple to make, making them a fantastic choice for novice bakers and kids. They require pantry staples and can easily be whipped up on a busy day during the festive season. Plus, the beautiful glaze generously topped with colorful sprinkles adds that extra touch of holiday spirit.
“The glaze is a game changer! They were a hit at our family potluck, and I loved how versatile they are for decorating!”
The Cooking Process Explained
Creating these Glazed Christmas Cookies is a step-by-step affair, taking you from mixing the dough to drizzling on the gorgeous glaze. You’ll start by mixing the dry ingredients separately, then combining them with the wet ingredients for a delightful cookie dough. After baking, there’s just a little wait for cooling before the fun part—glazing and decorating. Each step leads you closer to those beautiful, festive cookies!
What You’ll Need
To bring these cookies to life, gather the following ingredients:
- 2 3/4 cups all-purpose flour
- 1 teaspoon baking powder
- 1/2 teaspoon salt
- 1 cup unsalted butter, softened
- 1 1/2 cups granulated sugar
- 1 egg
- 1 teaspoon vanilla extract
- 2 cups powdered sugar
- 2-3 tablespoons milk
- Food coloring (optional)
- Sprinkles (optional)
If you’re looking for substitutions, you can use margarine in place of butter and almond extract instead of vanilla for a different flavor profile!
Step-by-Step Instructions
Now, let’s get baking! Follow these simple directions to create your Glazed Christmas Cookies:
- Preheat the oven to 350°F (175°C).
- In a mixing bowl, whisk together the flour, baking powder, and salt.
- In a separate bowl, cream together the softened butter and granulated sugar until the mixture is light and fluffy.
- Beat in the egg and vanilla extract until well combined.
- Gradually add the dry ingredients into the wet mixture, mixing just until combined.
- Roll the dough into small balls and place them on a parchment-lined baking sheet.
- Bake for 8-10 minutes, or until the edges turn lightly golden.
- Allow the cookies to cool completely on a wire rack.
- For the glaze, mix together powdered sugar and milk in a bowl; add food coloring if desired.
- Drizzle the glaze over the cooled cookies and sprinkle with extra toppings, such as sprinkles or edible glitter. Let the glaze set before enjoying!
Best Ways to Enjoy It
Once your cookies are decorated, there are plenty of ways to enjoy them! These make a delightful addition to your holiday dessert table, or you can package them in festive tins as gifts for friends and family. Serve them alongside a warm cup of cocoa, coffee, or tea for a cozy holiday treat. You can even create a DIY cookie decorating station at a holiday party to see who can come up with the most creative designs!
Keeping Leftovers Fresh
Storing your Glazed Christmas Cookies properly ensures that they maintain their delicious flavor and texture. After the glaze has set, place the cookies in an airtight container at room temperature. Enjoy them within a week for the best taste. If you want to make them ahead of time, you can freeze the baked cookies without glaze for up to three months. Just thaw and glaze them when you’re ready to serve!
Pro Chef Tips
Here are a few tricks to elevate your cookie-making experience:
- Ensure your butter is softened but not melted; this helps achieve the perfect cookie texture.
- For extra flavor, experiment with spices like nutmeg or cinnamon added to the dry ingredients.
- Invest in a piping bag for more precise glazing and decorating—it’s worth it for those picture-perfect cookies!
Creative Twists
Ready to shake things up? Here are some variations you can try:
- Incorporate different flavorings in the glaze, like orange or peppermint extract.
- Swap out sprinkles for chopped nuts or dried fruit for a unique take.
- Experiment with adding chocolate chips to the dough for a delightful chocolatey addition.
FAQs
How long do these cookies take to prepare?
The entire process, from prep to baking, takes about 30-40 minutes. Just make sure to set aside a little extra time for cooling and glazing.
Can I use whole wheat flour instead of all-purpose flour?
Certainly! Using whole wheat flour will give a nuttier flavor to the cookies. Just remember that the texture may vary slightly.
What’s the best way to store glazed cookies?
Once the glaze has set, place cookies in an airtight container at room temperature. If you’re not serving them within a week, consider freezing them without glaze.
With these Glazed Christmas Cookies, you’ll not only have a treat that everyone will love but also a special recipe that can become a cherished holiday tradition. Happy baking!
Glazed Christmas Cookies
Ingredients
Method
- Preheat the oven to 350°F (175°C).
- In a mixing bowl, whisk together the flour, baking powder, and salt.
- In a separate bowl, cream together the softened butter and granulated sugar until the mixture is light and fluffy.
- Beat in the egg and vanilla extract until well combined.
- Gradually add the dry ingredients into the wet mixture, mixing just until combined.
- Roll the dough into small balls and place them on a parchment-lined baking sheet.
- Bake for 8-10 minutes, or until the edges turn lightly golden.
- Allow the cookies to cool completely on a wire rack.
- For the glaze, mix together powdered sugar and milk in a bowl; add food coloring if desired.
- Drizzle the glaze over the cooled cookies and sprinkle with extra toppings, such as sprinkles or edible glitter.
- Let the glaze set before enjoying!