
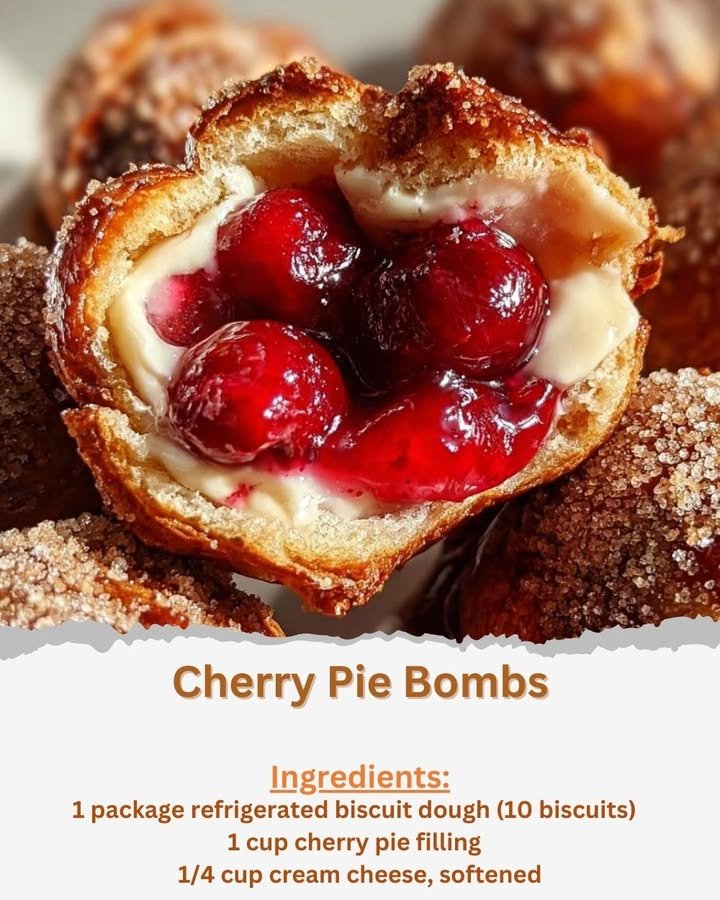
Cherry Pie Bombs
Step-by-step instructions
Now that you have everything ready, let’s dive into the simple yet satisfying steps to create these Cherry Pie Bombs:
- Preheat your oven to 375°F (190°C).
- In a small bowl, blend the cream cheese, granulated sugar, and vanilla extract until smooth and creamy.
- On a lightly floured surface, take each biscuit dough and flatten it into a 4-inch circle.
- Place a teaspoon of cherry pie filling in the center of each dough circle.
- Add a small dollop of the cream cheese mixture on top of the cherries.
- Carefully fold the dough over the filling and pinch the edges together to seal, creating a small ball.
- Arrange the filled dough balls seam side down on a greased baking sheet.
- Brush each ball with melted butter and sprinkle ground cinnamon over them.
- Bake for 15-18 minutes or until they turn golden brown.
- Allow cooling slightly, then dust with powdered sugar before serving, if desired.
Best ways to enjoy it
When it comes to serving, you can let your creativity shine! These Cherry Pie Bombs are delightful on their own, but you can elevate the experience by pairing them with a scoop of vanilla ice cream or a dollop of whipped cream. For a brunch-style presentation, arrange them on a beautiful platter alongside fresh fruits and a pot of coffee or hot chocolate. They can also be a charming addition to a dessert table at parties.
Keeping leftovers fresh
To ensure your Cherry Pie Bombs maintain their deliciousness, it’s essential to know how to store them properly. If you have any leftovers, store them in an airtight container at room temperature for up to two days. If you wish to keep them longer, you can freeze them. Just remember to let them cool completely before wrapping them individually in foil or placing them in a freezer-safe bag. When you’re ready to enjoy, pop them back in a preheated oven at 350°F (175°C) for a few minutes to warm them up.
Helpful cooking tips
Here are a few tips to elevate your Cherry Pie Bombs:
- Ensure your cream cheese is softened to make mixing easier and achieve a smooth filling.
- Don’t overfill the dough; a teaspoon of cherry filling and cream cheese mixture is just right.
- Experiment with different spices like nutmeg or even a hint of almond extract for a unique flavor twist.
Creative twists
For those looking to mix it up, consider these variations for your Cherry Pie Bombs:
- Different Fillings: Swap out the cherry pie filling for other fruits like peach, apple, or mixed berries.
- Toppings: Drizzle melted chocolate over the finished bombs for an indulgent touch, or sprinkle with nuts for added crunch.
- Dietary Adjustments: Make them gluten-free by using a gluten-free biscuit dough or vegan by opting for a non-dairy cream cheese and sugar substitute.
Your questions answered
How long does it take to prepare Cherry Pie Bombs?
The entire process, from prep to baking, takes about 30-40 minutes, making them a quick and delightful dessert option!
Can I use homemade pie filling?
Absolutely! Homemade cherry pie filling can add a personal touch to this recipe. Just ensure the consistency is similar to store-bought.
How should I store leftover Cherry Pie Bombs?
Store any leftovers in an airtight container at room temperature for up to two days or freeze them for up to three months for longer storage.

Cherry Pie Bombs
Ingredients
Method
- Preheat your oven to 375°F (190°C).
- In a small bowl, blend the cream cheese, granulated sugar, and vanilla extract until smooth and creamy.
- On a lightly floured surface, take each biscuit dough and flatten it into a 4-inch circle.
- Place a teaspoon of cherry pie filling in the center of each dough circle.
- Add a small dollop of the cream cheese mixture on top of the cherries.
- Carefully fold the dough over the filling and pinch the edges together to seal, creating a small ball.
- Arrange the filled dough balls seam side down on a greased baking sheet.
- Brush each ball with melted butter and sprinkle ground cinnamon over them.
- Bake for 15-18 minutes or until they turn golden brown.
- Allow cooling slightly, then dust with powdered sugar before serving, if desired.