
There’s something truly magical about the first bite of a cherry pie. I remember my first encounter with Cherry Pie Bombs vividly—it was during a blissful summer day filled with laughter and sunshine. My friend Sarah had invited me over for an impromptu baking session. We planned to make a traditional cherry pie, but as we rummaged through the pantry, we found some leftover dough and a jar of homemade cherry filling. That’s when inspiration struck: why not transform those classic flavors into bite-sized delights? The moment we took our first bites, the world melted away. The flaky crust gave way to a burst of sweet, tangy cherry filling, and with that bite, I knew we had created something special. It was pure joy, and ever since, Cherry Pie Bombs have held a cherished place in my heart.
Flavor and Popularity
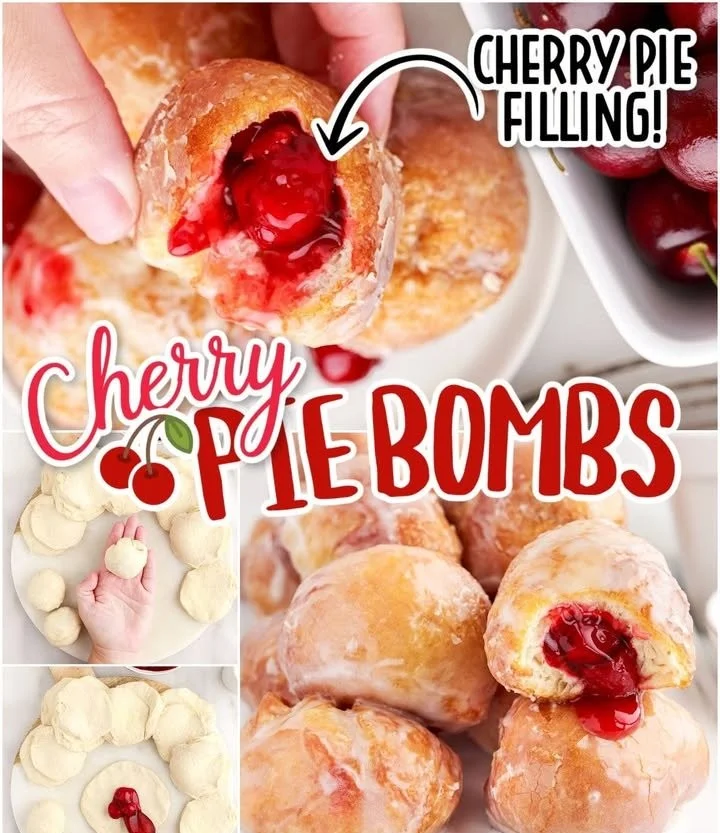
The Unique Flavor Profile of Cherry Pie Bombs
Cherry Pie Bombs offer an explosion of flavors that whisk you away to a warm, sunlit kitchen. The sweet and tart cherries dance playfully with the buttery, flaky crust, creating a comforting harmony inside every bite. It’s this contrast that enthralls and enchants—each bomb is like a treasure chest of vibrant cherry goodness, enveloped in a crisp exterior that beckons you to take one more bite.
The experience begins with the first crunch, followed by the juicy release of cherry filling. This flavor combination is not only enjoyable; it also tells a story. Whether it’s the nostalgia of summer picnics or the warmth of family gatherings, the taste of Cherry Pie Bombs is imbued with rich memories. As you share these delights with family and friends, their delighted exclamations will echo your own feelings—these morsels are an instant classic.
Why This Recipe Is a Family Favorite and Crowd-Pleaser
Cherry Pie Bombs have quickly become a favorite in our household, but they also have the knack for stealing the spotlight at gatherings. Their charm lies in their simplicity and versatility. Not only can they be made as a sweet treat, but they can also serve as an elegant dessert centerpiece, effortlessly adapting to casual or festive occasions.
What I love most is how inviting they are. Picture this: a warm batch of Cherry Pie Bombs cooling on the kitchen counter, the enticing aroma wafting through the air, pulling everyone in. They’re perfect for parties because they’re easy to grab and enjoy with one hand, leaving the other free for a glass of refreshing lemonade. Plus, who doesn’t love a treat that unites cherished flavor memories with a fun, modern twist?
Ingredients and Preparation
Essential Ingredients and Possible Substitutions
Crafting your own Cherry Pie Bombs is as accessible as it is rewarding. Here’s what you’ll need:
- Pie Dough: Use store-bought for simplicity or whip up your own. If you’re feeling adventurous, a flaky biscuit dough creates a delightful alternative.
- Cherry Filling: Fresh cherries are dreamy in this recipe, but frozen or canned cherries work beautifully. Feel free to mix in a tablespoon of cornstarch if you want a thicker filling.
- Sugar: Adjust depending on the sweetness of your cherries; brown sugar adds a deeper flavor.
- Cinnamon: A dash enhances the cherry flavor brilliantly.
- Egg Wash: An egg mixed with water for that golden finish.
In case you run out of any of these ingredients, feel free to substitute. For instance, any fruit pie filling, such as blueberry or apple, works equally well, offering a creative twist.
Step-by-Step Recipe Instructions with Tips
Making Cherry Pie Bombs is a delightful process that’s simpler than you think. Here’s how to do it with ease:
Prepare the Dough: If you’re making pie dough from scratch, combine flour, butter, sugar, and salt in a bowl, mixing until crumbly. Gradually add cold water until the dough forms. Wrap in plastic and chill for at least 30 minutes.
Make the Filling: In a bowl, combine your cherry filling, adjusting sugar and adding a sprinkle of cinnamon. If using fresh cherries, pit and chop, then toss with sugar and a little cornstarch for thickening.
Roll the Dough: On a floured surface, roll out your chilled pie dough to about 1/8-inch thick. Using a circular cutter, cut out circles approximately 4 inches in diameter.
Fill the Bombs: Place a spoonful of cherry filling in the center of each dough circle. Fold the sides up over the filling, pinching the seams to seal.
Brush with Egg Wash: Transfer the filled bombs to a lined baking sheet. Brush the tops with the egg wash to achieve that glorious golden color.
Bake: Preheat your oven to 375°F (190°C) and bake for about 25-30 minutes, or until golden brown.
Cool and Serve: Let the bombs cool slightly before enjoying. Serve warm for the best flavor experience.
To elevate your bombs, consider adding a scoop of vanilla ice cream or a drizzle of warm chocolate sauce when serving.
Cooking Techniques and Tips
How to Cook Cherry Pie Bombs Perfectly
Achieving perfection in your Cherry Pie Bombs might seem challenging, but with a bit of attention, you’ll impress everyone. Ensure the oven is adequately preheated, as this guarantees that the outside cooks quickly, sealing in the juices and keeping the filling from leaking.
Another tip: let your dough rest after rolling. This prevents shrinkage and helps maintain that delectable flaky texture. Consider adding a sprinkle of coarse sugar on top before baking for an extra crunch that contrasts beautifully with the soft filling.
Common Mistakes to Avoid
One of the most common mistakes is overfilling the bombs. While it’s tempting to pile on the filling, remember that too much can cause them to burst open during baking. Stick to a single generous tablespoon—just enough for a burst of deliciousness without the mess.
Another pitfall is underbaking. If you pull them out too soon, you might end up with soggy bottoms. A golden brown crust means you’ve found that perfect balance between flaky goodness and gooey filling!
Health Benefits and Serving Suggestions
Nutritional Value of Cherry Pie Bombs
While Cherry Pie Bombs are a delightful treat, it’s worth noting that cherries are packed with beneficial nutrients. They’re a good source of vitamins A and C and have anti-inflammatory properties. The crust, especially if made with whole grain flour, can offer some fiber content as well. Enjoy them in moderation, and they can be part of a balanced diet.
Best Ways to Serve and Pair This Dish
Serve your Cherry Pie Bombs warm, perhaps with a side of whipped cream or a scoop of ice cream for an indulgent dessert that feels decadent but comforts the soul. They pair wonderfully with coffee for brunch or tea for an afternoon snack.
For the adventurous, consider serving them alongside a tart cherry compote for dipping. This enhances the cherry flavor without overpowering it, transforming each bite into a mouthwatering experience.
FAQ Section
Can I use different fruits instead of cherries for Cherry Pie Bombs?
Absolutely! Feel free to experiment with blueberries, raspberries, or even a mix of fruits. Each will bring its unique flavor profile while remaining delicious!
Can I make the filling ahead of time?
Yes! You can prepare your cherry filling in advance and store it in the fridge for a few days. This makes it easier to whip up fresh Cherry Pie Bombs right when you need them.
How do I store any leftovers?
Place leftover Cherry Pie Bombs in an airtight container in the refrigerator. They’ll stay fresh for about three days. You can reheat them in the oven at a low temperature for the best texture.
Can I freeze Cherry Pie Bombs?
Yes, you can freeze unbaked or baked bombs. For unbaked, simply assemble them, freeze them on a baking sheet, then transfer to a freezer bag for up to three months. Bake them straight from the freezer—just add a few extra minutes to the baking time.
As you wander through the kitchen, I hope the thought of making Cherry Pie Bombs fills you with the same warmth it brings to my heart. They’re not just a recipe; they are a piece of home, a bit of happiness to share. If you’re like me, you’ll find joy in the simple things, and nothing is quite as comforting as homemade treats crafted with love. Trust me, you’ll want to make this again and again!

Cherry Pie Bombs
Ingredients
For the Dough
- 2 cups Flour All-purpose flour or whole grain for added fiber.
- 1/2 cup Butter Cold and cut into small pieces.
- 1 tbsp Sugar To sweeten the dough.
- 1/2 tsp Salt Enhances flavor.
- 4-6 tbsp Cold water To bring dough together.
For the Filling
- 2 cups Cherry filling Use fresh cherries, frozen, or canned, with cornstarch for thicker consistency.
- 1/2 cup Sugar Adjust based on sweetness of cherries.
- 1 tsp Cinnamon Enhances cherry flavor.
- 1 large Egg For egg wash.
Instructions
Preparation
- If making pie dough from scratch, combine flour, butter, sugar, and salt in a bowl, mixing until crumbly.
- Gradually add cold water until the dough forms. Wrap in plastic and chill for at least 30 minutes.
Filling Preparation
- In a bowl, combine cherry filling, adjusting sugar and adding a sprinkle of cinnamon.
- If using fresh cherries, pit and chop them, then toss with sugar and a little cornstarch for thickening.
Assembly
- On a floured surface, roll out the chilled pie dough to about 1/8-inch thick.
- Using a circular cutter, cut out circles approximately 4 inches in diameter.
- Place a spoonful of cherry filling in the center of each dough circle.
- Fold the sides up over the filling, pinching the seams to seal.
Baking
- Transfer the filled bombs to a lined baking sheet.
- Brush the tops with egg wash to achieve a golden color.
- Preheat oven to 375°F (190°C) and bake for about 25-30 minutes, or until golden brown.
- Let the bombs cool slightly before enjoying. Serve warm for the best flavor.
