
20-Minute Homemade Bread: A Journey of Flavor and Comfort
Sometimes, the best moments in life are wrapped in warm bread. I still remember the first time I whipped up a batch of 20-Minute Homemade Bread in my tiny kitchen. It was a chilly Chicago evening, and the scent of warm, buttery bread filled my modest apartment, wrapping around me like a cozy hug. I found myself standing there, marveling at how simple ingredients transformed into something so soothing and satisfying in just twenty minutes. The first bite sent waves of nostalgia through me, reminiscent of family dinners where laughter echoed through candle-lit rooms and the warmth of fresh bread brought us all closer together.
As I tore off chunks of the still-steaming loaf, I felt a sense of accomplishment and warmth wash over me—not just from the bread, but from the memories it stirred. 20-Minute Homemade Bread became my go-to recipe, instant comfort food that never failed to impress friends and family. Let me take you on a delightful journey through this cherished recipe, and I promise you’ll find a connection as profound as I did.
Flavor and Popularity
The Unique Flavor Profile of 20-Minute Homemade Bread
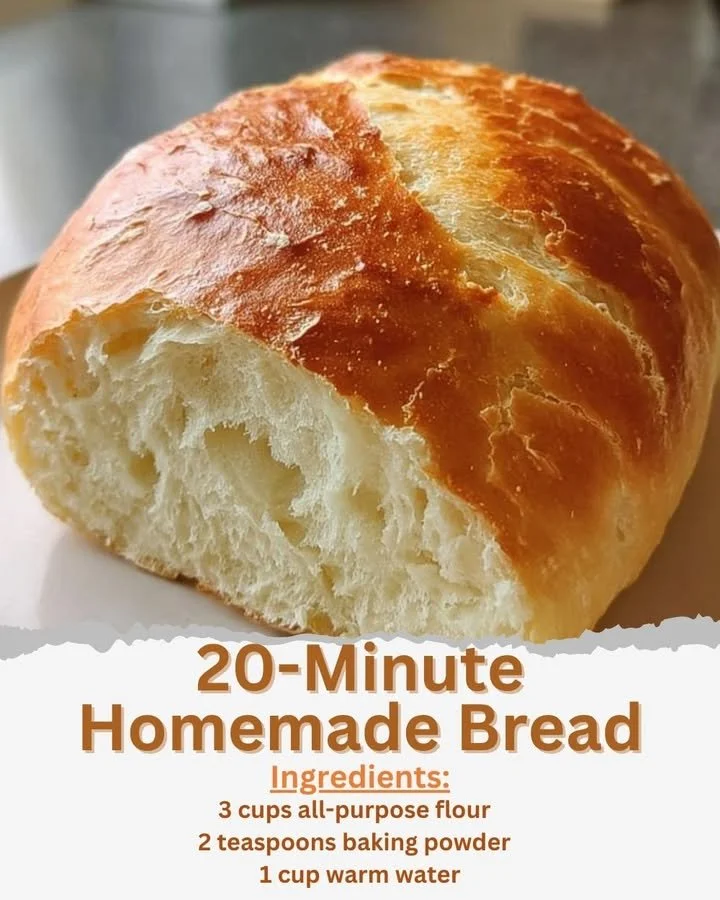
At its core, 20-Minute Homemade Bread embodies the essence of simplicity and richness. The crust is perfectly golden-brown, crackling slightly when you pinch it, while the interior reveals a soft, airy texture that melts in your mouth. The flavor dances between mildly sweet and delicately savory, offering the perfect canvas for your favorite toppings—be it a slather of herb-infused butter, a spread of tangy jam, or even a drizzle of honey.
Adding fresh herbs like rosemary or thyme enhances the earthy notes of the bread, bringing out that warm, comforting aroma. Whether you’re enjoying a quiet breakfast alone or serving it as a side to a hearty meal, this bread packs a flavorful punch sure to impress. The versatility and speed of this recipe have made it a beloved staple in many households—perfect for those last-minute gatherings when you want to serve something special without spending hours in the kitchen.
Why This Recipe Is a Family Favorite and Crowd-Pleaser
Nothing compares to breaking bread together, and 20-Minute Homemade Bread has become a staple in my home, often making appearances at family gatherings, holiday feasts, and lazy Sunday brunches. The simplicity of preparation allows even the busiest among us to enjoy a fresh loaf, creating an opportunity for togetherness and connection.
It quickly became a family favorite as well, with my nieces and nephews begging me to make it whenever they visit. The joy on their faces when they see the loaf emerge from the oven is priceless. There’s an undeniable magic in the transformative process, where simple flour, yeast, salt, and water become something so warm and inviting that it’s impossible not to smile. Trust me—when you break out this recipe, you’ll become the favorite chef in your circle too!
Ingredients and Preparation
Essential Ingredients and Possible Substitutions
Creating 20-Minute Homemade Bread requires only a few essential ingredients, making it a breeze to whip up on a whim.
| Ingredient | Quantity | Possible Substitutions |
|————————-|——————————|———————————-|
| All-purpose flour | 2 cups | Whole wheat flour, gluten-free flour |
| Warm water | 3/4 cup | Buttermilk (for added flavor) |
| Active dry yeast | 1 packet (2 1/4 tsp) | Instant yeast |
| Sugar | 1 tablespoon | Honey or agave syrup |
| Salt | 1 teaspoon | Sea salt or flavored salt |
| Olive oil (optional) | 2 tablespoons | Melted butter |
These ingredients transform into a warm, fragrant loaf that you can enjoy in no time. If you like to switch things up, consider adding seeds like sesame or poppy to the mix for extra texture and delightful flavor.
Step-by-Step Recipe Instructions with Tips
Ready to create your own 20-Minute Homemade Bread? This simple recipe follows easy instructions, and I promise you’ll be rewarded with delightful results.
Preheat your oven to 375°F (190°C). If you’re using a baking stone or cast iron skillet, place it in the oven as it preheats.
Combine dry ingredients: In a large mixing bowl, whisk together 2 cups of all-purpose flour, 1 packet of active dry yeast, 1 tablespoon of sugar, and 1 teaspoon of salt.
Add water: Slowly pour in 3/4 cup warm water, mixing with a wooden spoon or your hands until a shaggy dough forms.
Knead and shape: Turn the dough onto a lightly floured surface and knead for about 2-3 minutes until the dough is smooth and elastic. Shape it into a round or oval loaf, depending on your preference.
Let it rise: Place the dough onto a lightly greased baking sheet or inside your preheated skillet. Cover it with a clean kitchen towel and let it rise for 10 minutes.
Score the top: After the dough has rested, use a sharp knife to make shallow slashes across the top—this allows steam to escape and creates a beautiful design.
Bake: Put the dough into the oven and bake for 20 minutes or until golden brown and hollow-sounding when tapped on the bottom.
Cool and serve: Allow the bread to cool on a wire rack for a few minutes before slicing. The aroma will be irresistible!
Tips for success:
- Don’t skip the rest period—allowing the dough to rise makes all the difference.
- Experiment with various toppings before baking; sprinkle herbs, cheese, or seeds for added flavor!
Cooking Techniques and Tips
How to Cook 20-Minute Homemade Bread Perfectly
Achieving that perfect loaf of 20-Minute Homemade Bread is all about the right touches. Make sure your water temperature is warm, not hot, to avoid killing the yeast. Kneading the dough until it’s smooth is crucial to developing that desirable structure. A hot preheated oven will give your bread a nice crust. And remember, patience pays off; don’t rush the rising time!
Common Mistakes to Avoid
- Using cold water or too hot water: Ensure the water is warm to activate the yeast effectively.
- Skipping the kneading stage: Kneading creates gluten structure, which gives the bread its elasticity and chewiness.
- Over-baking: Keep an eye on your loaf. Every oven behaves differently, and you want to remove it while it’s perfectly golden.
Health Benefits and Serving Suggestions
Nutritional Value of 20-Minute Homemade Bread
Homemade bread encompasses wholesome ingredients without the preservatives often found in store-bought options. This bread is rich in carbohydrates and provides energy while offering more control over what goes into your loaf. Plus, you can customize it with whole grains or seeds for added nutrition.
Best Ways to Serve and Pair This Dish
20-Minute Homemade Bread shines best as an accompaniment to a hearty soup or salad. It’s perfect for slathering with creamy butter, drizzles of olive oil, or even your favorite spread like fresh jam or hummus. Serve it alongside dishes rich in flavors, think roasted vegetables or grilled meats, enhancing the entire dining experience.
FAQ Section
What type of mushrooms are best for 20-Minute Homemade Bread?
While mushrooms aren’t a traditional ingredient in this recipe, sautéing wild mushrooms can create a delicious topping. Varieties like shiitake or cremini bring an earthy depth that complements the bread beautifully.
Can I use dried garlic instead of fresh?
Absolutely! Dried garlic is a convenient alternative; just be mindful that it’s more concentrated. About 1/4 teaspoon of dried garlic powder can replace a clove of fresh garlic in your recipe.
How do I store leftover 20-Minute Homemade Bread?
Wrap the bread in a clean kitchen towel or plastic wrap and store it at room temperature for up to 3 days. For longer storage, slice the bread and place it in an airtight container or bag in the freezer.
Can I freeze 20-Minute Homemade Bread?
Yes! Freeze your bread once it has cooled completely. Wrap it tightly in plastic wrap and then foil to prevent freezer burn. It should maintain its quality for up to 3 months—defrost in the fridge or at room temperature.
Conclusion
If you’re like me—someone who cherishes the simple joys of cooking—making 20-Minute Homemade Bread is an experience you won’t want to miss. There’s something comforting about kneading the dough and watching it rise, knowing that in just a short while, you’ll have a warm loaf to share and enjoy. Each bite of this homemade bread will transport you to those cozy moments we all seek, filling your heart and home with warmth. Trust me, you’ll want to make this again and again; it truly is a recipe worth sharing!

20-Minute Homemade Bread
Ingredients
Main Ingredients
- 2 cups all-purpose flour Can substitute with whole wheat or gluten-free flour.
- 3/4 cup warm water Buttermilk can be used for added flavor.
- 1 packet (2 1/4 tsp) active dry yeast Instant yeast can be used as a substitute.
- 1 tablespoon sugar You can use honey or agave syrup instead.
- 1 teaspoon salt Sea salt or flavored salt can be used.
- 2 tablespoons olive oil (optional) Melted butter is a good alternative.
Instructions
Preparation
- Preheat your oven to 375°F (190°C). If using a baking stone or cast iron skillet, place it in the oven as it preheats.
- In a large mixing bowl, whisk together the all-purpose flour, active dry yeast, sugar, and salt.
- Slowly pour in the warm water, mixing with a wooden spoon or your hands until a shaggy dough forms.
- Turn the dough onto a lightly floured surface and knead for about 2-3 minutes until the dough is smooth and elastic. Shape it into a round or oval loaf.
- Place the dough onto a lightly greased baking sheet or inside your preheated skillet. Cover it with a clean kitchen towel and let it rise for 10 minutes.
- Use a sharp knife to make shallow slashes across the top of the dough.
- Put the dough into the oven and bake for 20 minutes or until golden brown and hollow-sounding when tapped on the bottom.
- Allow the bread to cool on a wire rack for a few minutes before slicing.
