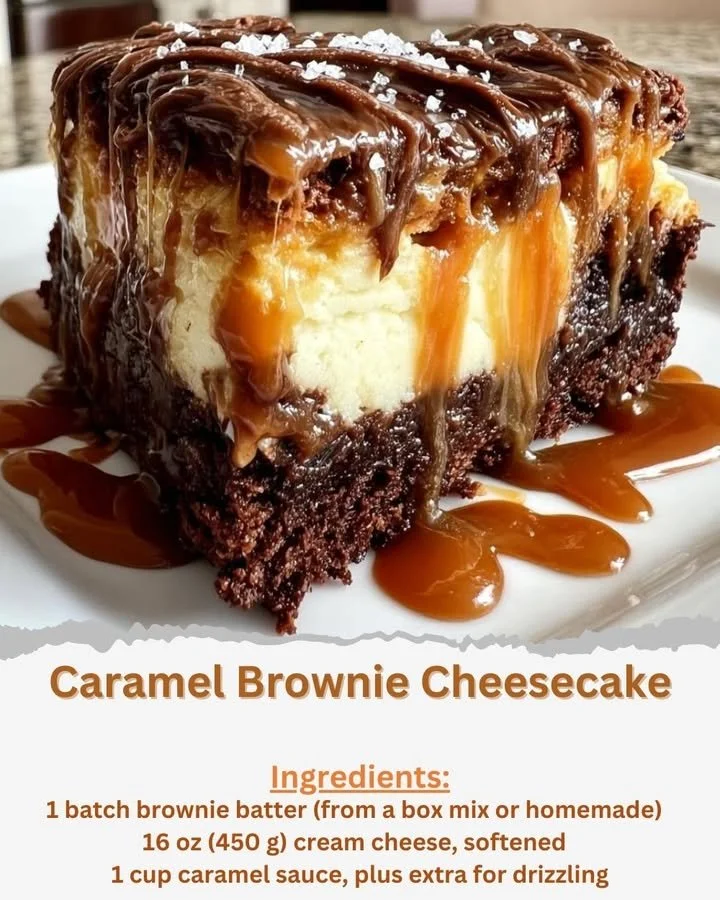
Caramel Brownie Cheesecake
Step-by-step instructions
Now, let’s dive into the detailed directions for creating your delectable Caramel Brownie Cheesecake:
- Preheat your oven to 325°F (163°C) and grease a 9-inch springform pan.
- Pour half of the brownie batter into the bottom of the pan and spread it evenly.
- In a large bowl, beat the cream cheese using a hand mixer or stand mixer until it’s smooth.
- Gradually add the sugar, continuing to beat until creamy.
- Add the eggs, one at a time, mixing well. Then stir in vanilla extract, sour cream, and flour until just combined.
- Spread half of the cream cheese mixture over the brownie layer in the pan.
- Drizzle half of the caramel sauce over the cheesecake layer.
- Add remaining brownie batter in spoonfuls on top and carefully spread the rest of the cream cheese mixture over that.
- Using a knife or skewer, swirl the remaining caramel sauce throughout the top layer, creating a beautiful marbled effect.
- Bake for 60-70 minutes until the cheesecake is mostly set, with a slight jiggle in the center.
- Turn off the oven, crack the door open, and let the cheesecake cool slowly inside for about 1 hour.
- Once cooled, let it sit at room temperature until completely cooled, then refrigerate for at least 4 hours or overnight before serving.
- Drizzle with extra caramel sauce and sprinkle sea salt flakes on top before slicing and serving.
Best ways to enjoy it
When it comes time to serve your Caramel Brownie Cheesecake, consider these delightful suggestions to elevate the experience:
- Serve each slice with a dollop of whipped cream or a scoop of vanilla ice cream.
- Pair it with fresh berries to add a vibrant touch and a bit of acidity to balance the richness.
- For an extra indulgent option, drizzle additional warm caramel sauce over individual servings right before presenting.
Keeping leftovers fresh
To ensure the last bites of your Caramel Brownie Cheesecake stay as delicious as the first, follow these storage tips:
- Refrigeration: Store any leftovers in an airtight container in the refrigerator. It will keep well for about 5 days.
- Freezing: You can freeze the cheesecake for up to 2 months. Wrap individual slices tightly with plastic wrap and then place them in a freezer-safe container.
- Thawing: When you’re ready to enjoy, simply transfer the cheesecake from the freezer to the fridge a few hours before serving to thaw gently.
Helpful cooking tips
Here are some tips to ensure your Caramel Brownie Cheesecake turns out perfectly:
- Room Temperature Ingredients: Make sure your cream cheese is at room temperature for a smoother texture.
- Don’t Overmix: When adding the eggs and flour, mix just until combined to ensure a light texture.
- Cooling Gradually: Allowing your cheesecake to cool gradually in the oven helps prevent cracks in the surface.
Creative twists
Once you’ve mastered the basics, feel free to experiment with these fun variations:
- Add a layer of nuts or crushed cookies in between the brownie and cream cheese layers for added texture.
- For a different flavor profile, swap half the cream cheese for mascarpone cheese to give a uniquely rich taste.
- Consider drizzling with chocolate sauce or experimenting with flavored caramel, like sea salt or vanilla.
FAQs
What’s the preparation time for this cheesecake?
The preparation time is around 30 minutes, and you’ll need a total of at least 5 hours (including cooling time in the fridge) before serving.
Can I use a different type of caramel sauce?
Absolutely! You can use homemade caramel for a more personalized touch, or opt for flavored varieties like salted caramel to enhance the taste.
How should I serve the cheesecake if I want it to look extra special?
For a restaurant-quality presentation, slice the cheesecake using a hot knife (dip it in hot water and wipe it dry) to create clean edges. Arrange slices on plated dishes, drizzle with caramel, and garnish with fresh fruit or mint leaves.
Now that you’re equipped with this comprehensive guide to Caramel Brownie Cheesecake, it’s time to gather your ingredients and get baking! Enjoy the delightful experience of creating and sharing this irresistible dessert.