
The first time I made Butterfinger Cupcakes, I was a bundle of nerves and excitement. It was one of those lazy Sunday afternoons when the sun poured through my tiny kitchen window, casting golden rays across my countertop. I had just moved into a new apartment, still navigating the maze of unpacked boxes and assorted kitchen gadgets I was still figuring out how to use. I’d heard whispers about the heavenly combination of chocolate, peanut butter, and toffee, and simply couldn’t resist. The cupcakes rose slowly in the oven, their sweet aroma melding with the heady scent of melted chocolate. As I took the first bite, I was enveloped in a wave of nostalgia that took me back to my childhood days of enjoying Butterfinger bars, a treat I cherished then and still do today.
Butterfinger Cupcakes are not just desserts; they carry memories, evoking smiles and happy gatherings. I often serve them at celebrations, and they quickly become the star of the show!
Flavor and Popularity
The Unique Flavor Profile of Butterfinger Cupcakes
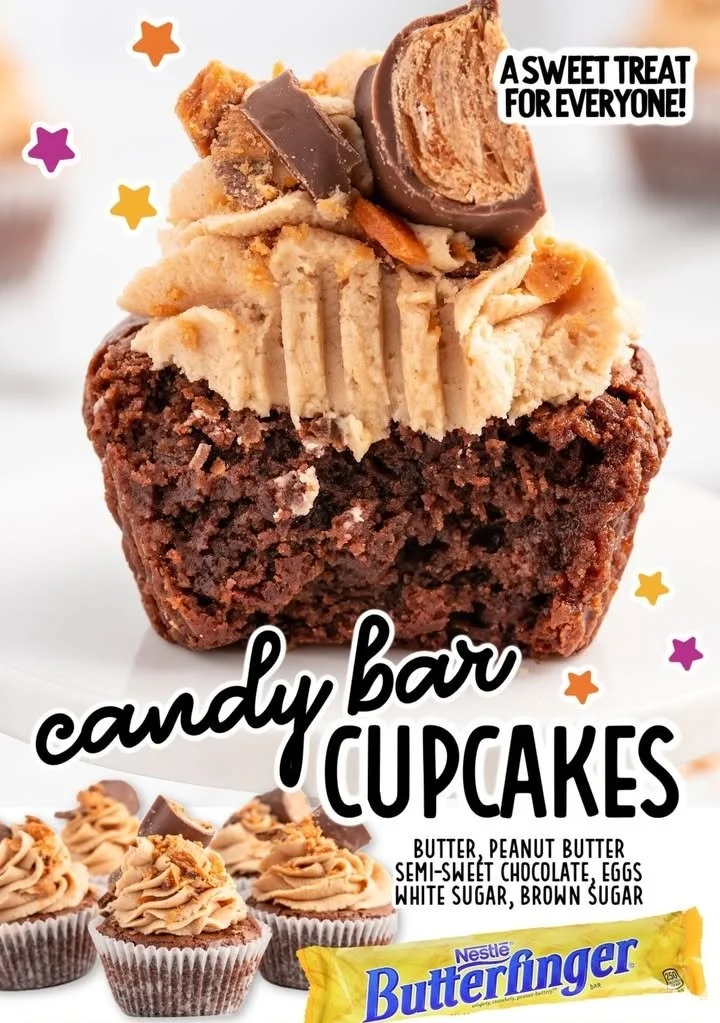
When it comes to flavors, Butterfinger Cupcakes deliver an enticing mix of sweet and salty. The chocolate cake base offers a rich, moist foundation that pairs perfectly with the creamy peanut butter frosting. As if that wasn’t enough, crushed Butterfinger candies sprinkled on top add a delightful crunch and a burst of caramel-like goodness. It’s a sensory experience that not only tantalizes your taste buds but also ignites your senses. Each bite transports you to a nostalgic moment when indulgence was guilt-free and every treat was an adventure.
Why This Recipe Is a Family Favorite and Crowd-Pleaser
These cupcakes have an uncanny ability to bring people together. Armed with their playful textures and comforting flavors, they transform ordinary days into special occasions. Friends often ask for the recipe when they taste them for the first time, and kids, well, they just can’t get enough! The combination of familiar flavors and fun presentation makes Butterfinger Cupcakes a hit at birthday parties, potlucks, and even casual weeknight dinners. Whether shared among friends or relished alone with a cup of coffee, they consistently leave a lasting impression.
Ingredients and Preparation
Essential Ingredients and Possible Substitutions
To create these delightful Butterfinger Cupcakes, you will need the following ingredients:
- All-purpose flour: The backbone of the cupcakes, providing structure.
- Granulated sugar: Sweetens the batter and adds moisture.
- Unsweetened cocoa powder: Gives the cake its rich chocolate flavor.
- Baking powder and baking soda: Help the cupcakes rise beautifully.
- Salt: Balances the sweetness.
- Eggs: Add moisture and richness.
- Milk: Keeps the cupcakes tender.
- Vegetable oil: Ensures moisture and a light texture.
- Vanilla extract: Infuses warmth and depth.
- Peanut butter: The creamy star of the frosting.
- Powdered sugar: Sweetens the frosting, creating a soft texture.
- Butterfinger candies: The cherry on top, both for the frosting and for garnish.
You can easily customize this recipe! For a gluten-free option, replace all-purpose flour with a gluten-free baking blend. Want to cut down on sugar? Use a sugar substitute in the cupcake batter and frosting for a lighter version.
Step-by-Step Recipe Instructions with Tips
Now, let’s get into the fun part—baking! Here’s how to make your Butterfinger Cupcakes:
Preheat and Prepare: Preheat your oven to 350°F (175°C). Line a cupcake pan with cupcake liners.
Mix Dry Ingredients: In a large bowl, whisk together the flour, sugar, cocoa powder, baking powder, baking soda, and salt until well combined.
Combine Wet Ingredients: In another bowl, whisk together eggs, milk, vegetable oil, and vanilla extract.
Blend Together: Gradually add the wet mixture to the dry ingredients, stirring until just combined. Avoid overmixing to keep your cupcakes fluffy.
Fill the Cups: Divide the batter evenly into the prepared cupcake liners, filling each about two-thirds full.
Bake: Place the cupcake pan in the preheated oven and bake for about 18-20 minutes or until a toothpick inserted into the center comes out clean.
Cool Completely: Remove the cupcakes from the oven and let them cool in the pan for 5 minutes before transferring them to a wire rack to cool completely.
Make the Frosting: In a medium bowl, beat together the peanut butter and softened butter until creamy, then gradually add the powdered sugar and mix until smooth. If the frosting is too thick, add a tablespoon of milk to achieve your desired consistency.
Frost and Garnish: Once the cupcakes are completely cool, frost them generously with the peanut butter frosting and sprinkle crushed Butterfinger candies on top.
Serve and Enjoy: Your Butterfinger Cupcakes are ready to be devoured!
Cooking Techniques and Tips
How to Cook Butterfinger Cupcakes Perfectly
To ensure your Butterfinger Cupcakes are the best they can be, keep an eye on your oven’s temperature—every oven varies slightly. It’s a good idea to invest in an oven thermometer for accuracy. Also, letting your cupcakes cool completely before frosting them prevents melty mishaps. And remember, frosting while the cupcakes are warm may lead to a gooey mess!
Common Mistakes to Avoid
One common mistake is overmixing the batter. This can result in denser cupcakes rather than the light, fluffy texture we all adore. Don’t forget to measure your ingredients accurately, too—baking is a science! Finally, keep an eye on the cupcakes as they bake; an extra couple of minutes in the oven can dry them out.
Health Benefits and Serving Suggestions
Nutritional Value of Butterfinger Cupcakes
While Butterfinger Cupcakes are a delightful treat, they can be enjoyed in moderation. Each cupcake delivers a blast of energy from sugar and fat, so they’re great for a special occasion! You could certainly experiment with healthier ingredients to make them even more nutritious without sacrificing quality.
Best Ways to Serve and Pair This Dish
Butterfinger Cupcakes shine at any gathering. Serve them alongside a tall glass of cold milk or a rich cup of coffee. They also pair splendidly with homemade ice cream for an extra indulgent treat. If it’s a celebration, consider adding a sprinkle of festive edible glitter or serve them on a beautiful cake stand to really make them pop.
FAQ Section
Can I make Butterfinger Cupcakes ahead of time?
Absolutely! You can bake the cupcakes a day in advance. Just store them in an airtight container at room temperature and frost them the day you plan to serve them. This keeps the cupcakes moist.
Can I use natural peanut butter instead of creamy peanut butter?
Yes, you can! Natural peanut butter will give a slightly different texture to the frosting, but it still adds great flavor. Just make sure your peanut butter is well stirred if it has a lot of separation.
How can I store leftover Butterfinger Cupcakes?
Store any leftovers in an airtight container at room temperature for up to three days. If you have any un-frosted cupcakes, you can freeze them for a month. Just make sure they’re tightly wrapped!
Can I make these cupcakes gluten-free?
Yes! You can substitute all-purpose flour with a 1:1 gluten-free baking blend. Just ensure all your other ingredients are gluten-free as well.
There’s something comforting about making Butterfinger Cupcakes; they offer a sense of nostalgia and joy that brightens any day. If you’re like me, you’ll find yourself doing a little victory dance after the first bite. Baking can be a delightful escape, a way to show love, and Butterfinger Cupcakes represent that beautifully. Trust me, you’ll want to make this again and again. Let’s get baking and create some delicious memories together!
Butterfinger Cupcakes
Ingredients
Cupcake Base
- 1 cup All-purpose flour Can be substituted with gluten-free baking blend.
- 1 cup Granulated sugar Can be replaced with a sugar substitute.
- 1/2 cup Unsweetened cocoa powder
- 1 tbsp Baking powder
- 1/2 tsp Baking soda
- 1/4 tsp Salt
- 2 large Eggs
- 1/2 cup Milk
- 1/4 cup Vegetable oil
- 1 tsp Vanilla extract
Frosting
- 1/2 cup Peanut butter Use creamy peanut butter for best results.
- 1/4 cup Butter Softened.
- 2 cups Powdered sugar
Garnish
- 2 bars Butterfinger candies Crushed for topping.
Instructions
Preparation
- Preheat your oven to 350°F (175°C) and line a cupcake pan with cupcake liners.
- In a large bowl, whisk together the flour, sugar, cocoa powder, baking powder, baking soda, and salt until well combined.
- In another bowl, whisk together eggs, milk, vegetable oil, and vanilla extract.
- Gradually add the wet mixture to the dry ingredients, stirring until just combined. Avoid overmixing.
- Divide the batter evenly into the prepared cupcake liners, filling each about two-thirds full.
- Bake for about 18-20 minutes or until a toothpick inserted into the center comes out clean.
- Remove the cupcakes from the oven and let them cool in the pan for 5 minutes before transferring them to a wire rack to cool completely.
- In a medium bowl, beat together the peanut butter and softened butter until creamy, then gradually add the powdered sugar and mix until smooth. Adjust texture with milk if necessary.
- Once the cupcakes are completely cool, frost them generously with the peanut butter frosting and sprinkle crushed Butterfinger candies on top.
- Serve and enjoy your Butterfinger Cupcakes!
