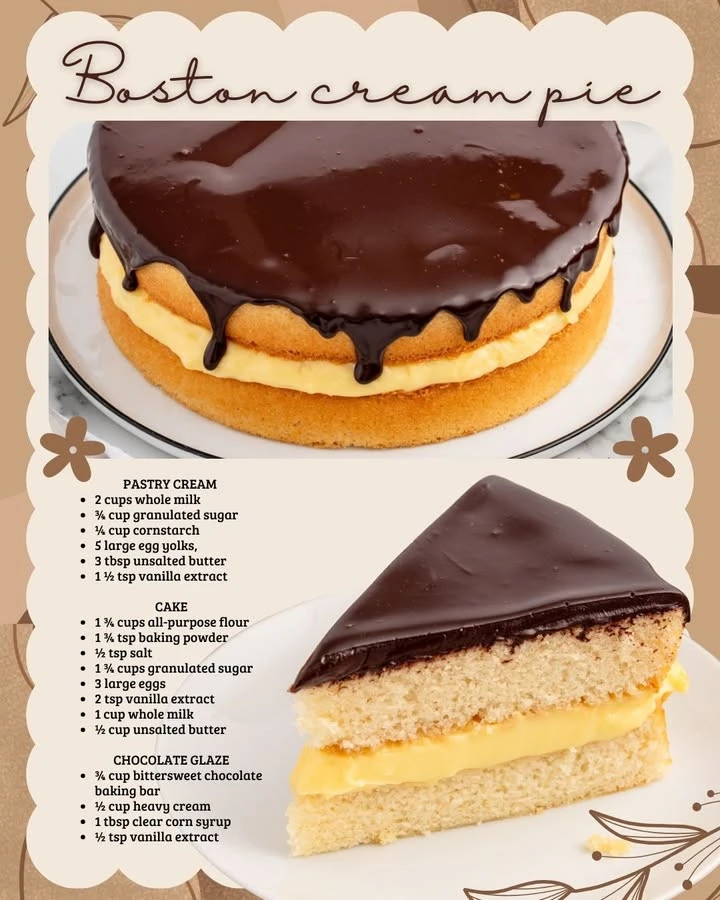
Boston Cream Pie
Introduction
Boston Cream Pie is a delightful dessert that truly deserves its name. This classic recipe features two layers of moist cake filled with a rich and creamy pastry cream, all topped with a glossy chocolate glaze. Often mistaken for a cake, it’s a delicious combination of textures and flavors that makes it a favorite for many. Whether you are preparing it for a special occasion or just because, Boston Cream Pie is sure to impress.
Why Make This Recipe
Making Boston Cream Pie is a wonderful way to treat yourself and your loved ones. This recipe combines simple ingredients to create an elegant dessert that looks and tastes fantastic. It’s a great balance of sweetness from the cream and chocolate, paired with a soft cake. If you enjoy baking and want to indulge in something special, this pie is perfect!
How to Make Boston Cream Pie
Creating your very own Boston Cream Pie is simpler than it seems. Follow these easy steps to create this delicious dessert that everyone will love.
Ingredients:
- 2 cups whole milk
- 3/4 cup granulated sugar
- 1/4 cup cornstarch
- 5 large egg yolks, room temperature
- 3 tablespoons unsalted butter
- 1 1/2 teaspoons vanilla extract
- 1 3/4 cups all-purpose flour
- 1 3/4 teaspoons baking powder
- 1/2 teaspoon salt
- 1 3/4 cups granulated sugar
- 3 large eggs, room temperature
- 2 teaspoons vanilla extract
- 1 cup whole milk
- 1/2 cup unsalted butter
- 3/4 cup finely chopped bittersweet chocolate baking bar
- 1/2 cup heavy cream
- 1 tablespoon clear corn syrup
- 1/2 teaspoon vanilla extract
Directions:
- Preheat the oven to 350°F (175°C). Grease and flour two 9-inch round cake pans.
- For the cake, mix together the flour, baking powder, and salt in a bowl. In another bowl, beat the sugar and unsalted butter until light and fluffy. Add the eggs and vanilla extract, mixing well. Gradually add the dry ingredients, alternating with the milk, until combined.
- Divide the batter evenly between the prepared pans. Bake for 25-30 minutes, or until a toothpick inserted comes out clean. Let them cool in the pans.
- For the pastry cream, whisk together the milk, sugar, and cornstarch in a saucepan over medium heat. In a separate bowl, beat the egg yolks. Slowly add the hot milk mixture to the yolks while whisking constantly. Pour the mixture back into the saucepan and cook until thickened. Remove from heat and stir in butter and vanilla extract. Let it cool.
- For the chocolate glaze, heat the heavy cream until just boiling. Pour it over the chopped chocolate, stirring until smooth. Add corn syrup and vanilla extract.
- To assemble, place one cake layer on a serving plate and spread the pastry cream over it. Top with the second cake layer. Pour the chocolate glaze over the top, allowing it to drip down the sides.
- Chill before serving, and enjoy!
How to Serve Boston Cream Pie
Boston Cream Pie is best served chilled. You can slice it into wedges and plate it for guests. A dollop of whipped cream on the side or a sprinkle of cocoa powder on top adds a nice touch.
How to Store Boston Cream Pie
Store any leftover Boston Cream Pie in the refrigerator. Cover it with plastic wrap or keep it in an airtight container. It should be good for about 3-4 days. Make sure to enjoy it chilled!
Tips to Make Boston Cream Pie
- Allow the cake layers to cool completely before adding the pastry cream. This prevents the cream from melting.
- You can prepare the pastry cream a day ahead to save time.
- If you want more chocolate flavor, increase the amount of chocolate in the glaze.
Variation
You can play with flavors by adding different extracts to the pastry cream, like almond or hazelnut. For a fruity twist, consider adding sliced strawberries or bananas between the layers.
FAQs
Q: Can I use store-bought pastry cream?
A: Yes, if you want to save time, store-bought pastry cream works well.
Q: Can I freeze Boston Cream Pie?
A: It’s not recommended to freeze Boston Cream Pie as it may change the texture of the cream and cake.
Q: Can I make this recipe gluten-free?
A: Yes, you can substitute all-purpose flour with a gluten-free baking blend. Just make sure to check the package instructions for any additional adjustments.
Enjoy your baking and treat yourself to a classic recipe that’s full of flavor!

