
Biscoff Cheesecake: A Sweet Hug in a Slice
PART 1: Personal Story Introduction
The first time I made Biscoff Cheesecake, I can vividly remember the scent wafting through my kitchen—it was a warm, buttery aroma that wrapped itself around me like a cozy blanket. It was a chilly October evening, and I had planned a gathering for my closest friends, hoping to impress them with something more than my usual chocolate chip cookies. As I mixed the creamy, tangy filling with the rich Biscoff spread, I felt an excited flutter in my stomach. This wasn’t just another dessert; this was the moment my culinary curiosity took a delicious turn. The anticipation bubbled over as I placed the cheesecake in the oven, believing it would be the star of the evening. It was that first bite—the decadent blend of velvety cheese and the uniquely spiced sweetness of Biscoff—that made the effort all worthwhile. This cheesecake was more than dessert; it was a sweet hug in a slice that lingered long after the crumbs were swept away.
Flavor and Popularity
The Unique Flavor Profile of Biscoff Cheesecake
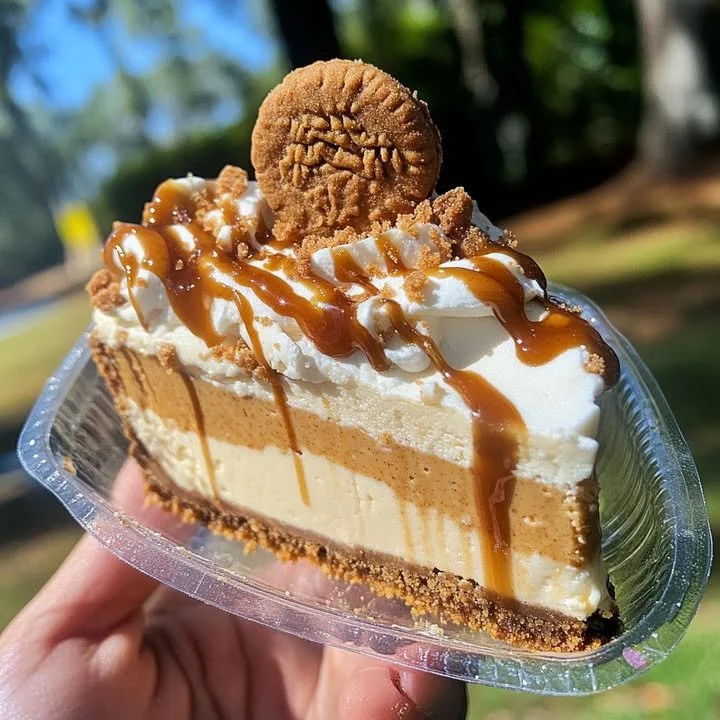
Biscoff Cheesecake stands out on any dessert table, showcasing a flavor profile that dances between sweet and spicy. The iconic Biscoff cookie, with its caramelized, buttery essence and just a hint of cinnamon, serves as the ideal companion to creamy cheesecake. The blend of tangy cream cheese harmonizes beautifully with the sweetness of the Biscoff spread and cookie crust, creating a delectable balance that pleases the palate.
The crust, made from crushed Biscoff cookies, provides a satisfying crunch that complements the smooth filling. Every element contributes to a multilayered experience—one moment, a creamy richness envelops you, and the next, a burst of spiced sweetness takes over. It’s no wonder that this dessert has become a family favorite and a showstopper at gatherings. Guests often ask for seconds—sometimes even thirds—the moment they taste it.
Why This Recipe Is a Family Favorite and Crowd-Pleaser
There’s a certain magic in how Biscoff Cheesecake can turn an ordinary moment into a memorable occasion. I often serve it during birthdays, holidays, or even casual get-togethers. Each time, I watch my friends and family devour it with delight. The Biscoff Cheesecake effortlessly bridges generations—my grandmother adores its nostalgia while my younger cousins go wild for its modern twist.
As I slice into this creamy wonder and serve it on elegant plates, it feels like I’m sharing a piece of my heart, a little taste of happiness. This recipe has the power to create connections and inspire joy around the table, making it a true crowd-pleaser.
Ingredients and Preparation
Essential Ingredients and Possible Substitutions
To make a scrumptious Biscoff Cheesecake, having the right ingredients is key. Here’s what you’ll need:
| Ingredient | Amount | Possible Substitutions |
|————————-|—————–|———————————–|
| Biscoff cookies | 300g (for crust)| Graham crackers, digestive biscuits|
| Unsalted butter | 100g | Coconut oil for a vegan option |
| Cream cheese | 600g | Ricotta cheese for a lighter texture|
| Powdered sugar | 200g | Granulated sugar or maple syrup |
| Biscoff spread | 250g | Nutella or another creamy spread |
| Eggs | 3 | Flaxseed mixture for vegan option |
| Vanilla extract | 1 teaspoon | Almond extract for a different flavor |
Step-by-Step Recipe Instructions with Tips
Creating a Biscoff Cheesecake is a delightful process. Follow these instructions, and you’ll be well on your way to baking your own masterpiece.
Prep Your Oven: Preheat your oven to 160°C (320°F).
Make the Crust:
- In a food processor, crush the Biscoff cookies until they become fine crumbs.
- Melt the unsalted butter and mix it with the cookie crumbs until fully combined.
- Press the mixture firmly into the bottom of a 9-inch springform pan to create an even layer. Bake for 10 minutes, then set aside to cool.
Prepare the Cheesecake Filling:
- In a large mixing bowl, blend the cream cheese until smooth and creamy.
- Add brown sugar and granulated sugar, mixing until well combined.
- Slowly incorporate the Biscoff spread and vanilla extract, blending again until you have a smooth filling.
Incorporate the Eggs:
- Add the eggs one at a time, mixing on low speed.
- Avoid over-mixing at this stage; just blend until each egg is incorporated.
Bake It:
- Pour the cheesecake mixture over the cooled crust, smoothing the top.
- Place the cheesecake in the oven and bake for 45–50 minutes until the edges are set and the center has a slight jiggle.
Cool and Chill:
- Once baked, turn off the oven and let the cheesecake cool inside with the door slightly ajar for about an hour.
- Transfer it to the refrigerator and let it chill for at least 4 hours, preferably overnight, for the best texture.
Final Touches:
- Before serving, you can top the cheesecake with extra Biscoff spread or crushed cookies for decoration.
Tips:
- Make sure all your ingredients are at room temperature for a smoother mixture.
- If you want a creamier texture, consider adding a dollop of sour cream.
Cooking Techniques and Tips
How to Cook Biscoff Cheesecake Perfectly
Baking the perfect Biscoff Cheesecake requires patience and a watchful eye. A few techniques can help ensure your cheesecake comes out perfectly every time:
Water Bath Method: For an ultra-creamy consistency, consider baking your cheesecake in a water bath, wrapping your springform pan in aluminum foil to prevent leaks. Place it in a larger dish filled with hot water during the baking process for an even bake.
Cooling Gradually: Avoid sudden temperature changes—this helps prevent cracks on the surface. Always let it cool inside the oven first.
Common Mistakes to Avoid
- Over-Mixing: Too much mixing can incorporate unnecessary air, leading to cracks during baking. Mix gently when adding eggs.
- Skipping the Chill: Cutting corners and serving the cheesecake too soon won’t yield the same dense creaminess. Let it chill as recommended!
Health Benefits and Serving Suggestions
Nutritional Value of Biscoff Cheesecake
While Biscoff Cheesecake is a decadent treat, there are ways to enjoy it responsibly. Here’s an overview of the nutritional aspects:
- Calories: Approximately 350 calories per slice (for a standard 12-serving cheesecake).
- Fats: The richness comes from ingredients like cream cheese, but you can lighten it by swapping some items.
- Serving Size: A small slice goes a long way in satisfying your sweet tooth.
Best Ways to Serve and Pair This Dish
Biscoff Cheesecake shines brightest when paired with complementary flavors. Here are some serving ideas:
- Light Whipped Cream: A dollop of whipped cream enhances the creaminess.
- Coffee or Tea: The spicy notes of the Biscoff cookies pair perfectly with a warm beverage.
- Fresh Berries: Adding fresh raspberries or strawberries provides a fruity contrast that balances the richness.
FAQ Section
What type of cookies are best for Biscoff Cheesecake?
The best cookies for Biscoff Cheesecake are actual Biscoff cookies. Their unique caramelized flavor perfectly complements the cheesecake. If unavailable, a digestive biscuit works in a pinch.
Can I use dried garlic instead of fresh?
Dried garlic doesn’t apply to this recipe as it focuses on sweet flavors. Stick with fresh ingredients for the best results.
How do I store leftover Biscoff Cheesecake?
Store leftover cheesecake in an airtight container in the refrigerator for up to five days. For optimal freshness, it’s best to cover the top with plastic wrap.
Can I freeze Biscoff Cheesecake?
Absolutely! You can freeze Biscoff Cheesecake for up to three months. Wrap it tightly in plastic wrap and then aluminum foil to prevent freezer burn. Thaw in the refrigerator overnight when you’re ready to indulge.
Conclusion
If you’re like me, the thought of enjoying a rich, creamy slice of Biscoff Cheesecake brings a smile to your face. There’s something comforting about a dessert that combines nostalgia with modern flavors, allowing you to relive sweet moments with every bite. Trust me, you’ll want to make this Biscoff Cheesecake again and again. It’s simple enough for a weekday treat yet impressive enough for special occasions. So, gather your ingredients and let your kitchen fill with that irresistible aroma—your heart (and your stomach) will thank you!
