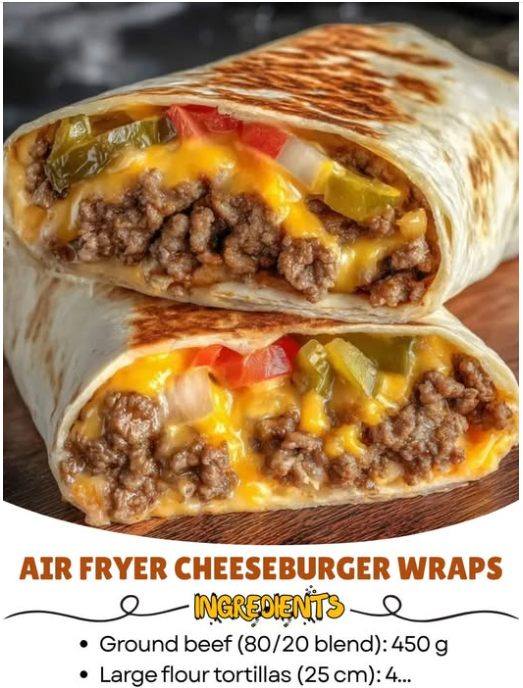
Mastering Air Fryer Cheeseburger Wraps
Introduction: The Air Fryer Advantage
The air fryer provides the perfect, oil-free environment for achieving a crunchy exterior on the wraps while rapidly melting the cheese and heating the filling.
The **Air Fryer Cheeseburger Wrap** simplifies the burger experience into a neat, crunchy package. Using the air fryer allows for minimal oil and maximum crispness in a short time, making it an ideal weeknight meal. Success hinges on three key regulations: **The Zero-Grease Protocol, The Tight-Roll Sealing Method, and The High-Heat Compression Rule.**
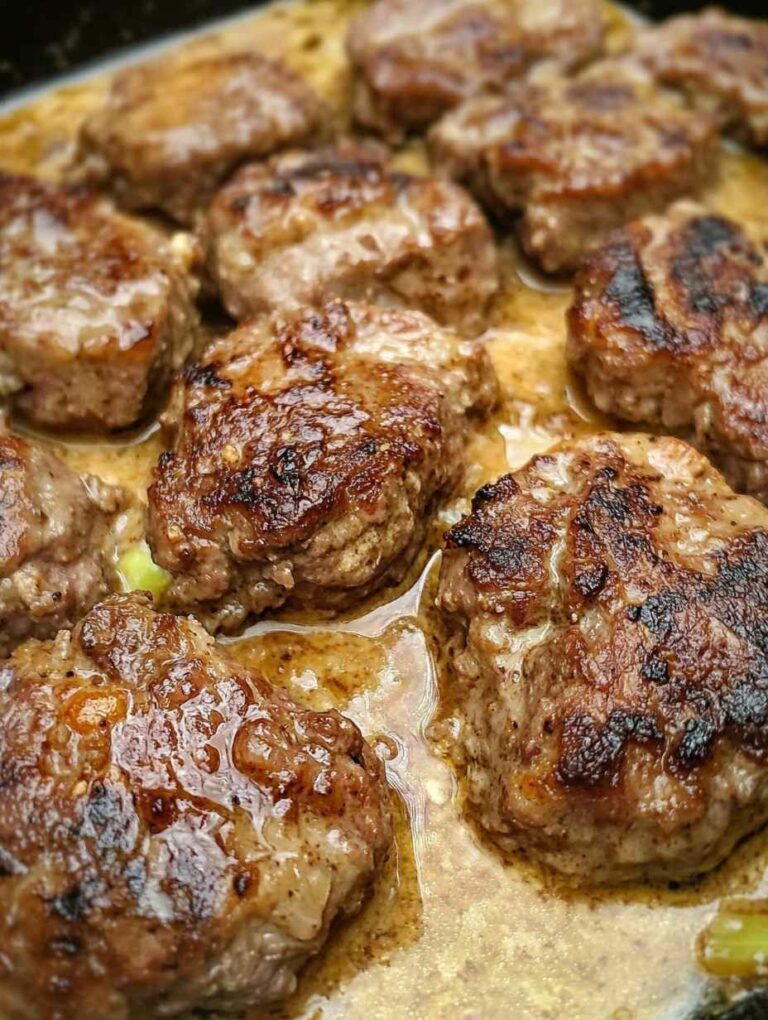
The first regulation, **The Zero-Grease Protocol**, is fundamental due to the nature of the *80/20 ground beef blend*. While the fat (20%) enhances flavor, it must be completely rendered and removed after cooking (Direction 1). Any residual grease will soak the **25 cm flour tortillas**, leading to a greasy, soft spot that can tear open when handled and make the entire wrap soggy and unpleasant after cooling. blotting the beef is often required.
The second regulation, **The Tight-Roll Sealing Method**, prevents blowouts in the air fryer. The wraps must be folded like burritos—sides folded in first, followed by a tight roll from the bottom (Direction 4). This technique creates a secure, structural pocket that prevents the melted cheese and filling from escaping when the internal temperature rises rapidly during air frying. A single, loose fold will likely lead to a messy failure.
The third regulation, **The High-Heat Compression Rule**, dictates the baking process. The wraps are air-fried at a high temperature (assumed $400^\circ\text{F}$ or $200^\circ\text{C}$). Before frying, they are typically brushed with the **4 tablespoons mayonnaise** (or oil, Direction 5), which not only adds flavor but serves as a fat source for rapid browning and crisping. Furthermore, the wraps should be placed **seam-side down** in the air fryer basket initially. This compression from the weight of the wrap against the basket prevents the seam from popping open during the first stage of cooking.
Ingredients: Defining Filling and Crispness
The complete ingredient list, detailing the core base and the assumed seasoning and filling components:
I. The Core Components:
- **450 g** ground beef (80/20 blend)
- **4 large** flour tortillas (25 cm)
- **4 tablespoons** mayonnaise (or melted butter/oil for browning)
II. The Filling and Sauce (Assumed Additions):
- **4 slices** American or cheddar cheese (The melt)
- **1/2 cup** diced onion (Flavor and crunch)
- **1/4 cup** ketchup (Sauce base)
- **1 tablespoon** yellow mustard (Tangy element)
- **1/2 teaspoon** salt and pepper (Seasoning)
Instructions: Cook, Roll Tight, and Crisp
Phase 1: Preparing the Filling
- **Cook and Drain Meat (ZERO-GREASE PROTOCOL):** Cook the **450 g ground beef** in a large skillet over medium-high heat, crumbling as you go. Once fully browned, drain off all excess grease meticulously. Return the meat to the skillet.
- **Season and Sauce:** Stir in the **$\frac{1}{2}$ tsp salt and pepper** (assumed). Add the **$\frac{1}{2}$ cup diced onion** (assumed), **$\frac{1}{4}$ cup ketchup**, and **1 Tbsp mustard** (assumed). Cook for 2–3 minutes, stirring, until the sauce reduces and coats the meat. Remove from heat and set aside.
Phase 2: Assembly and Rolling
- **Prep Tortilla:** Lay one **25 cm flour tortilla** flat. Place one **cheese slice** (assumed) slightly off-center on the bottom third of the tortilla.
- **Fill and Fold (TIGHT-ROLL SEALING):** Spoon $\frac{1}{4}$ of the **meat mixture** over the cheese. Fold the sides of the tortilla in, just past the filling. Then, tightly roll the wrap from the bottom up, creating a sealed pocket. Repeat for the remaining wraps.
Phase 3: Air Frying
- **Preheat and Prep:** Preheat the air fryer to **$400^\circ\text{F}$ ($200^\circ\text{C}$)**. Brush the outside of each tightly rolled wrap with **1 tablespoon of mayonnaise** (or oil).
- **Initial Fry (HIGH-HEAT COMPRESSION):** Place the wraps **seam-side down** in the air fryer basket. Cook in batches, if necessary, to avoid crowding. Air fry for **5 minutes**.
- **Flip and Finish:** Flip the wraps and cook for another **3–5 minutes**, or until they are golden brown, crispy, and the cheese is melted and bubbling inside.
- **Serve:** Remove from the air fryer. Let the wraps cool for 2–3 minutes before slicing and serving immediately.
Serving and Storage: The Freshest Crisp
Optimal handling for maintaining crispness:
- **Serving:** Serve warm with dipping sides like pickles, more mayonnaise, or a side salad.
- **Storage:** Store cooled leftovers in an airtight container in the refrigerator for up to **3 days**.
- **Reheating:** Reheat in the air fryer at $375^\circ\text{F}$ ($190^\circ\text{C}$) for 3–5 minutes until the exterior is re-crisped. Microwaving will result in a soft, non-crispy texture.
- **Make Ahead (Uncooked):** You can assemble the wraps (Steps 1–4) and refrigerate them, uncooked, for up to 24 hours. Brush with mayo and air fry directly from the fridge, adding 2–3 minutes to the total cook time.
Tips: Essential Techniques for a Crispy Wrap
Draining the Fat: After browning the **450 g ground beef** (Step 1), drain it in a colander, and then press the meat with paper towels to absorb any remaining fat. This is non-negotiable for a crisp shell.
The Mayo Brush: Brushing the wraps with **mayonnaise** (Step 5) provides fat for rapid browning, which gives the wraps a more golden color and a superior crunch compared to dry air frying. You can substitute with melted butter or oil.
Preventing Pop-Ups: If your air fryer tends to be aggressive, you can lightly **secure the wraps with a toothpick** (Step 6) on the seam side before frying. Just be sure to remove the toothpick before serving!
Filling Temperature: Ensure the **meat filling is still warm** (Step 4) when wrapping. This helps the cheese melt rapidly in the air fryer, cutting down on the overall cooking time and preventing the tortilla from drying out.
Air Circulation: Do not overcrowd the air fryer basket (Step 6). Cook in batches, allowing space between each wrap, to ensure maximum air circulation and uniform crisping.
Variations: Customizing Flavors and Fillings
Adapt the cheeseburger concept to different styles:
- **Jalapeño Popper:** Add **diced pickled jalapeños** to the meat filling (Step 2) and substitute the cheddar with **Monterey Jack cheese** for a spicy kick.
- **Mushroom Swiss:** Add **sautéed mushrooms** to the filling and use **Swiss or Gruyère cheese** for a richer, umami flavor.
- **Pickle Crunch:** After filling (Step 4), add a few slices of **dill pickle** on top of the meat before folding.
- **Sauce Swap:** Replace the ketchup and mustard (Step 2) with a mixture of **BBQ sauce and Worcestershire sauce** for a tangier filling.
**Tortilla Size:** Using **25 cm (large)** tortillas (Step 3) is necessary to accommodate the generous amount of filling and allow for proper folding/sealing. Smaller tortillas will rupture.
**Cheese Placement:** Place the cheese slice **on the tortilla first** (Step 3), under the meat. This ensures the cheese melts rapidly and acts as a glue to hold the filling together when hot.
**Air Fryer Wattage:** If your air fryer is a low-wattage model, increase the cooking time (Step 6 & 7) by 2–3 minutes per side to achieve the required crispness.
**Bake Alternative:** If you do not have an air fryer, you can **bake these wraps** in a conventional oven at $425^\circ\text{F}$ ($220^\circ\text{C}$) for 15–20 minutes, flipping once, until golden brown and crispy.
Conclusion: Crispy Comfort Food
The **Air Fryer Cheeseburger Wrap** is a perfect example of modern, convenient comfort food. By strictly adhering to the **Zero-Grease Protocol** and mastering the **Tight-Roll Sealing Method**, you ensure a filling that is rich and flavorful and an exterior that is perfectly crispy, not greasy or soggy. This easy-to-manage recipe delivers the full flavor of a classic cheeseburger in a handheld, crunchy format, making it a guaranteed family favorite.
Frequently Asked Questions (FAQ)
Q: Why did my wraps open up during air frying?
A: The wrap was **not rolled tightly enough** (Step 4) or the seam was **not placed down first** (Step 6). The seam must be securely pressed against the basket during the initial crisping phase.
Q: My tortilla got soft and wet after cooling. What happened?
A: The **ground beef was not properly drained** (Step 1). Residual grease and moisture from the meat or sauce seeped into the tortilla as it cooled. Use paper towels to blot the meat after draining.
Q: Can I use different ground meat?
A: **Yes.** You can use ground turkey or chicken, but you may need to add a small amount of oil to the filling (Step 2) as these are much leaner and can dry out quickly.
Q: Should I put lettuce and tomato in before frying?
A: **No.** (Step 4). Lettuce and tomato contain high water content and will steam the wrap, making it soggy. Add fresh toppings *after* the wrap is cooked and sliced.