
Chocolate Buttermilk Cake
Introduction
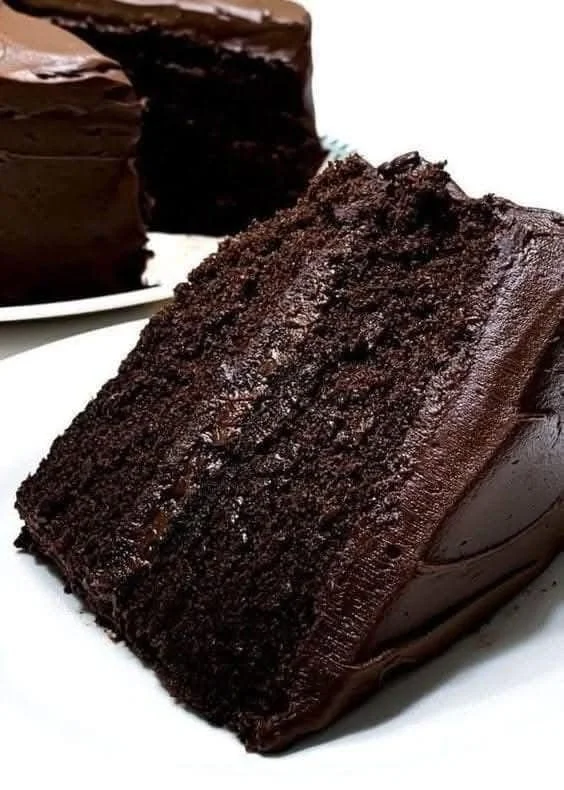
Chocolate Buttermilk Cake is a rich, moist dessert that is perfect for any occasion. With its deep chocolate flavor and creamy frosting, it brings a smile to every chocolate lover’s face. This cake is not just delightful to eat but also fun to make. Whether you are baking for a birthday, a celebration, or just a treat for yourself, this recipe is sure to impress.
Why Make This Recipe
You should make Chocolate Buttermilk Cake because it’s easy, delicious, and satisfying! The combination of chocolate and buttermilk creates a moist and tender cake that melts in your mouth. Plus, the recipe uses simple ingredients that you might already have in your kitchen. It’s a great way to show off your baking skills without complicating things!
How to Make Chocolate Buttermilk Cake
Ingredients:
- 2 cups all-purpose flour
- 2 cups granulated sugar
- 3/4 cup unsweetened cocoa powder
- 2 teaspoons baking powder
- 1 1/2 teaspoons baking soda
- 1 teaspoon salt
- 1 cup buttermilk (at room temperature)
- 1/2 cup vegetable oil
- 2 large eggs (at room temperature)
- 2 teaspoons vanilla extract
- 1 cup hot water
- 1 cup unsalted butter (softened)
- 3 1/2 cups powdered sugar
- 1/2 cup unsweetened cocoa powder
- 1/2 cup buttermilk (at room temperature)
- 2 teaspoons vanilla extract
- Pinch of salt
Directions:
- Preheat your oven to 350°F (175°C). Grease and flour two 9-inch round cake pans.
- In a large bowl, whisk together the flour, sugar, cocoa powder, baking powder, baking soda, and salt.
- Add the buttermilk, vegetable oil, eggs, and vanilla extract to the dry ingredients. Mix until combined.
- Gradually add the hot water to the batter, mixing well until smooth. The batter will be thin, but that’s okay.
- Pour the batter evenly into the prepared pans and bake for 30-35 minutes, or until a toothpick inserted into the center comes out clean.
- Allow the cakes to cool in the pans for 10 minutes, then transfer to a wire rack to cool completely.
- In a large bowl, beat the softened butter until creamy. Gradually add the powdered sugar and cocoa powder, beating until well combined.
- Add the buttermilk, vanilla extract, and salt. Beat until the frosting is smooth and fluffy.
- Once the cakes are completely cooled, spread a layer of frosting on top of one cake layer. Place the second cake layer on top and frost the top and sides of the cake.
How to Serve Chocolate Buttermilk Cake
Serve the Chocolate Buttermilk Cake at room temperature. You can enjoy it plain, or with a dollop of whipped cream or a scoop of vanilla ice cream for extra sweetness. It’s perfect for sharing with family and friends!
How to Store Chocolate Buttermilk Cake
Store your Chocolate Buttermilk Cake in an airtight container at room temperature for up to 3 days. If you want to keep it longer, you can refrigerate it for up to a week. For best results, wrap the cake tightly in plastic wrap before storing.
Tips to Make Chocolate Buttermilk Cake
- Make sure all your ingredients are at room temperature for the best mixing.
- Do not skip greasing and flouring the pans to prevent sticking.
- If you want to add a little extra flavor, consider adding a splash of coffee to the batter.
- Allow the cakes to cool completely before frosting to avoid melting the frosting.
Variation
For a fun twist, you can turn this cake into cupcakes! Simply pour the batter into cupcake liners and adjust the baking time to about 18-20 minutes. Frost them as usual for tasty chocolate cupcakes.
FAQs
Q1: Can I use milk instead of buttermilk?
A1: Yes, you can use regular milk, but the cake may not be as moist. Adding a tablespoon of vinegar or lemon juice to regular milk can mimic buttermilk.
Q2: How do I know when the cake is done?
A2: Insert a toothpick into the center of the cake. If it comes out clean or with a few crumbs, the cake is done.
Q3: Can I freeze Chocolate Buttermilk Cake?
A3: Yes, you can freeze the cake. Wrap it tightly in plastic wrap and then in aluminum foil. It can be frozen for up to 2 months.
