
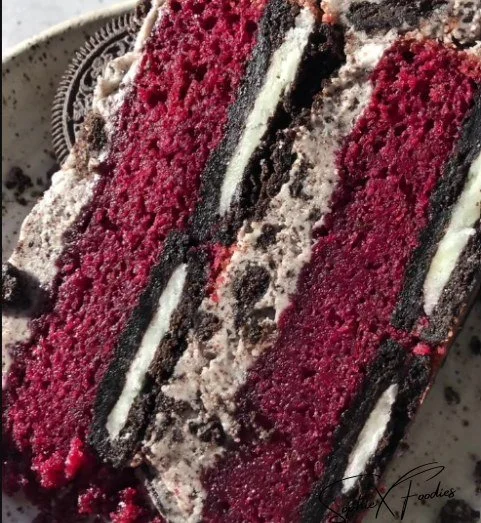
Oreo Red Velvet Cake
Oreo Red Velvet Cake is a delightful twist on the classic red velvet cake. Combining the rich chocolate flavor of red velvet with the cookie crunch of Oreos, this dessert is perfect for any celebration or just a sweet treat. The creamy frosting and soft layers make it an irresistible indulgence.
Why Make This Recipe
If you’re looking to impress your friends and family with a stunning dessert, Oreo Red Velvet Cake is the way to go. It’s visually striking, easy to make, and packed with flavor. Plus, who can resist the combination of soft cake and crunchy Oreos? It’s ideal for birthdays, anniversaries, or any special occasion.
How to Make Oreo Red Velvet Cake
Ingredients:
- 2 1/2 cups all-purpose flour
- 1 1/2 cups granulated sugar
- 1 teaspoon baking soda
- 1 teaspoon salt
- 2 tablespoons unsweetened cocoa powder
- 1 cup vegetable oil
- 1 cup buttermilk
- 2 large eggs
- 1 tablespoon red food coloring
- 1 teaspoon vanilla extract
- 1 teaspoon white vinegar
- 8 ounces cream cheese, softened
- 1/2 cup unsalted butter, softened
- 4 cups powdered sugar, sifted
- 1 teaspoon vanilla extract
- 10 Oreo cookies, crushed into small pieces
- Additional Oreo cookies, crushed or whole (for decoration)
Directions:
- Preheat your oven to 350°F (175°C) and prepare three 8-inch round cake pans by greasing and flouring them or lining with parchment paper.
- In a large bowl, sift together the flour, sugar, baking soda, salt, and cocoa powder.
- In another bowl, whisk together the vegetable oil, buttermilk, eggs, red food coloring, vanilla extract, and white vinegar until smooth.
- Gradually combine the wet ingredients into the dry ingredients, mixing until smooth.
- Divide the batter evenly between the prepared cake pans and smooth the tops with a spatula.
- Bake for 25-30 minutes, or until a toothpick inserted into the center comes out clean.
- Allow the cakes to cool in the pans for 10 minutes, then transfer to wire racks to completely cool.
- In a large bowl, beat together softened cream cheese and butter until creamy.
- Gradually add in the sifted powdered sugar, one cup at a time, mixing well after each addition. Then add the vanilla extract and beat until light and fluffy.
- Gently fold in the crushed Oreo cookies until evenly mixed.
- To assemble, place one cake layer on a serving plate and spread a generous layer of Oreo cream cheese frosting over it, then repeat with remaining layers.
- Use remaining frosting to cover the top and sides of the cake, smoothing it out with a spatula.
- Optionally, garnish the cake with additional Oreos, and chill for easier slicing if desired.
- Slice and enjoy the delicious Oreo Red Velvet Cake!
How to Serve Oreo Red Velvet Cake
Serve your Oreo Red Velvet Cake at room temperature. You can slice it into wedges and place on dessert plates. A scoop of vanilla ice cream or a dollop of whipped cream on the side can make it even better!
How to Store Oreo Red Velvet Cake
Store any leftover cake in an airtight container in the refrigerator. It will keep well for up to 3-5 days. If you want to freeze it, wrap the cake tightly in plastic wrap and then in foil. It can be frozen for up to 3 months.
Tips to Make Oreo Red Velvet Cake
- Measure your ingredients carefully for the best results.
- Make sure the cream cheese and butter are at room temperature for smooth frosting.
- Do not skip chilling the cake if you want cleaner slices when serving.
- You can add more or fewer crushed Oreos in the frosting based on your taste.
Variation
For a different flavor, you can swap out the crushed Oreos with other cookies like chocolate chip cookies or even peppermint cookies during the holidays. Enjoy experimenting!
FAQs
1. Can I use regular milk instead of buttermilk?
Yes, if you don’t have buttermilk, you can make a substitute by mixing one cup of regular milk with one tablespoon of lemon juice or vinegar. Let it sit for 5-10 minutes before using.
2. How do I make the cake gluten-free?
You can use a gluten-free all-purpose flour blend instead of regular flour. Make sure it has a good binding agent for the best texture.
3. Can I make this cake ahead of time?
Yes, you can bake the cake layers ahead of time. Just wrap them tightly and store them in the refrigerator or freezer until you are ready to frost and serve.
