
Banana Pudding Cheesecake Cones
Introduction
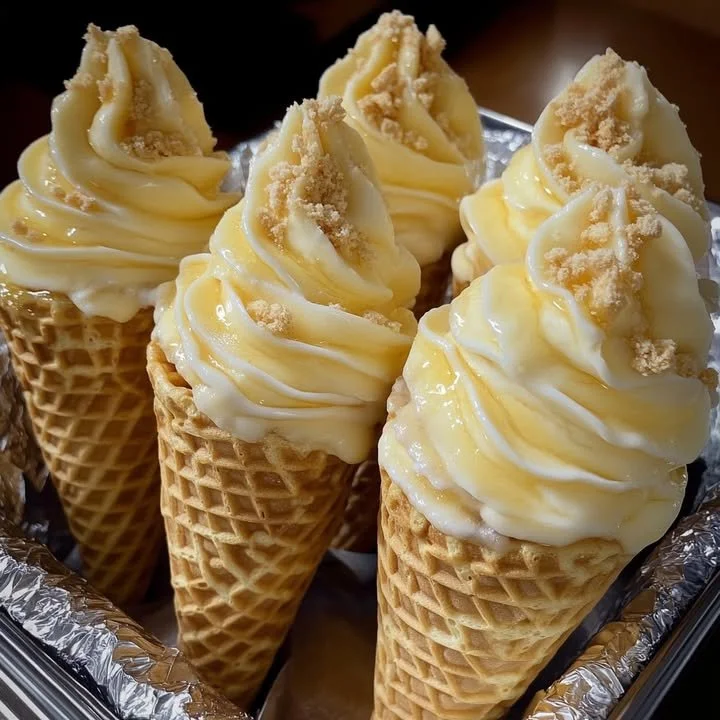
Banana Pudding Cheesecake Cones are a delicious and fun twist on traditional banana pudding. They combine the creamy flavors of cheesecake with the crunchy texture of waffle cones, making them a perfect treat for any occasion. Whether you are hosting a party or just want a sweet snack, these cones are sure to please everyone!
Why Make This Recipe
Creating Banana Pudding Cheesecake Cones is easy and rewarding. They are not only visually appealing but also incredibly tasty. The combination of creamy cheesecake, banana pudding, and the crunch of waffle cones makes for a delightful treat. Plus, they are portable, so you can take them to picnics, potlucks, or enjoy them at home. This recipe is perfect for anyone who loves banana pudding and cheesecake!
How to Make Banana Pudding Cheesecake Cones
Making these cheesecake cones is simple. Follow the steps below to create this scrumptious dessert.
Ingredients:
- 8 oz cream cheese, softened
- 1 cup powdered sugar
- 1 cup heavy whipping cream (cold)
- 1/2 tsp vanilla extract
- 1/4 cup instant banana pudding mix
- 1/2 cup milk (to prepare pudding)
- 8–10 waffle cones
- 1 cup crushed vanilla wafers
- 1/2 cup white chocolate, melted
- Additional crushed vanilla wafers
- Drizzle of white chocolate
Directions:
Prepare the Banana Cheesecake Filling: In a small bowl, whisk together the instant banana pudding mix and milk. Chill for 5 minutes until thickened. Beat the softened cream cheese and powdered sugar until smooth and creamy. In a separate bowl, whip the cold heavy whipping cream with vanilla extract until stiff peaks form. Fold the whipped cream into the cream cheese mixture, then fold in the chilled banana pudding. Refrigerate for 20 minutes to firm up.
Prepare the Cones: Dip the open ends of the waffle cones in melted white chocolate. Immediately coat the dipped edges with crushed vanilla wafers. Let them set on a parchment-lined tray.
Assemble the Cheesecake Cones: Fill a piping bag or zip-top bag with the banana cheesecake filling. Pipe the filling generously into the prepared cones. Garnish with additional crushed wafers and a drizzle of white chocolate.
Chill and Serve: Refrigerate the cones for at least 30 minutes to allow the filling to set. Serve cold and enjoy these creamy, crunchy, and delightful cones!
How to Serve Banana Pudding Cheesecake Cones
Serve the Banana Pudding Cheesecake Cones cold. You can place them on a nice platter for parties or individual cups for a more casual setting. Add extra toppings like crushed wafers or a drizzle of chocolate for an added touch!
How to Store Banana Pudding Cheesecake Cones
If you have any leftover cones, store them in the refrigerator. Keep them in an airtight container to maintain their freshness. They are best enjoyed within a couple of days.
Tips to Make Banana Pudding Cheesecake Cones
- Make sure the cream cheese is softened before mixing for a smooth texture.
- Use cold heavy cream for better whipped results.
- Feel free to add slices of banana on top for extra flavor and garnish.
Variation
You can switch up the flavors by using chocolate pudding mix instead of banana pudding. This will give you a chocolate cheesecake version!
FAQs
1. Can I use homemade pudding instead of instant pudding?
Yes, you can use homemade banana pudding, but make sure it is thick enough to hold its shape in the cones.
2. How long do these cones stay fresh?
The cones are best served within 2-3 days. After this time, the cones may become soggy.
3. Can I freeze these cones?
These cones are not recommended for freezing, as the texture of the cones may change once thawed. Enjoy them fresh!
Now you have a delightful recipe for Banana Pudding Cheesecake Cones to impress your friends and family. Enjoy making and sharing this sweet treat!
